Well, I got out my totes full of Christmas decorations and put out a few things here and there, but that is as far as I got. I hate it when I get distracted. Anyway, I put up a few things on the wall, got some of my greenery out and got out a couple trees. I got one of my trees out and thought that it needed something different this year. I was thinking about what I could put on the tree in order to bring some life to it and I thought some little rag ball ornaments would be cute. Well, I had some old glass ball ornaments that I don’t use anymore so I thought I would put them to good use. I grabbed some red homespun and let my creativity go to work. I was pretty pleased with the way that they turned out too. Here is a brief tutorial…..
~~~~~~~~~~~~~~~~~~~~~~
I took my Elmer’s glue and watered it down just a little bit. I used a q-tip to mix the glue up and apply it to the bulb.

I then took my homespun and tore it into small thin pieces and then cut a few to put in areas that might not get covered. I made sure that my strips were frayed so it would look just like a rag ball. I wanted something real prim for my tree.

I applied my glue and totally covered the glass bulb.

I started wrapping the homespun around the bulb and added extra glue when I needed it.

Completely wrap all areas of the bulb. When you are finished…totally and completely cover the bulb with the glue mixture. This will allow the bulb to dry and harden. Once the rag ball decorations are dry, the cloth will be hard and that will prevent the homespun from moving or unraveling.

Here are a few that I made. I hung them in a place where I knew they would dry quickly. This prim gal is not patient (lol).

I then decided that I needed to do something to cover up those bright gold tops. So, I applied more glue and sprinkled them with cinnamon. Not only do they look great, but they smell wonderful too. Here they are on my tree. So, what do you think? Really looks cute on my tree – huh?

I also coffee stained my tree skirt. It wasn’t quite dark enough for me. So, after a big distraction and a little break, I am off to do more decorating. More pictures coming soon.
Until Next Time……..Lisa


22 comments:
Good way to use what you have Lisa. I think covering your bulbs was a wonderful idea. Can't wait to see more decorating.
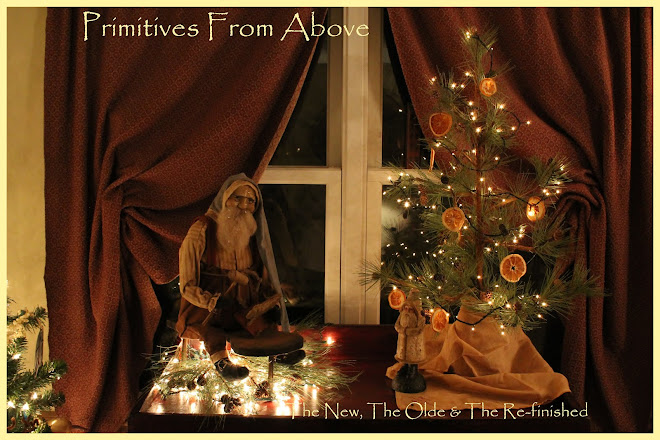
I love your table in your header. Such a simple table arrangement yet it makes such a statement.
Enjoy your day,
AMY
Lisa, what a cute idea! I am going to do a small tree
for the kitchen/dining area with small kitchen utensils.....You have me wanting to get started today! I can't wait to see what else you come up with. Did you know shadow and flag boxes are on sale again? Isn't it fun to decorate for Christmas?
Bear Hugs~Karen
teLisa, How wonderful is that? Great job, girl! It's just the little things that add so much. Thanks for sharing!
Friends,
Susannah
Your tree is adorable! I love the ragballs and the coffee stained skirt:)
Very cute Lisa! I love the idea.
Your tree is adorable, LOve your Santa. Thanks for sharing this. I will make some for my trees.
What a great idea :)
We can always reuse our older things, just have to be creative.
I can't wait to see more pictures of your house all decorated. I had intensions of decorating this weekend but come to find out it will be a jammed pack full weekend with no time at all for that. So I guess I may start for the first of the week. Christmas is something like 36 days away...that is coming faster then we can imagine.
Lisa~Those are so darn cute!
I can't wait to see your home decorated this year! I know you will definitely post pictures...what kind of a prim girl would you be if you didn't?!
Have a good night!
Great idea Lisa!! I don't have any glass balls - but I just might need to buy some now!!
Lisa - what a wonderful idea! Those little glass bulbs hardly cost anything! Waiting to see some more.
Oh I love these! I love that small tree too.
Lisa,
thanks for sharin' that idea ! What a great way to use up my scraps of homespun! Love your header picture.
Prim Huggs n Blessins
Teresa Jo
What a awesome idea!!! Thanks for sharing, I love your little tree and tree skirt!
We think a lot alike! LOL I did the same thing a few years ago with all of the glass balls we had! Jer and I didn't have a lot of money when we first started and we bought two boxes of assorted metallic balls but they weren't cutting it on my Prim tree, a little makeover and they're perfect :)
You can also spray paint them and paint little designs on them.
I used white puffy paint to make a few snowflakes on some, too.
Or use some glue and cinnamon and make them look rusty :)
Leslie
LOVE THE RAG BALLS.... GREAT WAY TO USE UP SCRAPS FROM THE SEWING BASKET.....
Neat idea and look oh so prim on the little tree. Santa and the tree skirt really look great too. Off to a good start, my friend!! Keep those pics coming!!
Hugs, Sherrie
Lisa,
Your rag ball ornaments turned out great!!
~Cindy~
Awesome idea!! Love love the rag ball ornaments!! Thanks for sharing!!!
Grany Trace'
What a cute idea, Lisa!! Can't wait to see more of your Christmas decor!
Enjoy your weekend, my friend!
~Kris~
I like those and so easy, too. I think I have lots of those little bulbs, you could make big ones for your big tree, too.
Nice job on your rag balls. I might have to try that one.
Lisa
Looks great Lisa!! Great recycling idea as well :)
Post a Comment